


Non-slip covering
Non-slip cover self-adhesive
NONSLPCOV-SA-BLACK-0,05X9M
Art.-no. 0894301005
EAN 4061975594433
Register now and access more than 125,000 products
Smooth, wet or oily floors cause painful falls and accidents
- Non-slip cover for clean, non-slip floors
- Investment in the safety of employers, customers and visitors
Easy to use
- Simple, quick and clean to apply without having any specialist knowledge
- Durable and abrasion-resistant
- Self-adhesive
- Easy to clean
Non-slip mineral-oil grain
- Embedded in a tough, durable polymer and securely bonded with a strong, dimensionally stable polyester film
- Anti-slip rating R13 in accordance with DIN EN 16165:2023-02
Caution: Optimum bonding of the film with the substrate is reached after approx. 48 hours. Until this point, do not attempt to adhere anything or expose the glued textured design film to major stresses (such as car wash facilities, steam jets etc.).
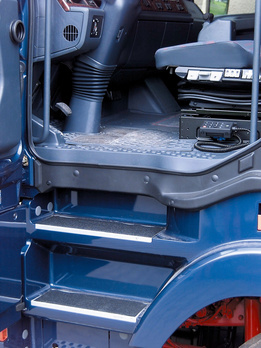 Lorry cab
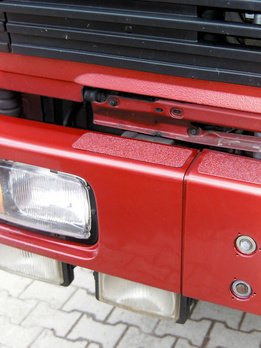 Truck bumper
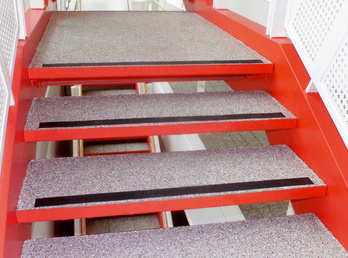 Stairs
Datasheets(X)

On all smooth surfaces with a heavy footfalls and vehicle traffic, such as trucks, buses, loading surfaces, passageways, production and storage rooms, public buildings, ramps, stairs, ladders, steps on machinery, construction vehicles, cranes etc.
The surfaces must be clean, dry and smooth. Damaged or broken areas must be repaired. Tools required: Pressure roller (art. no. 0693011755)
- 1. Individual non-slip pieces should be positioned at a minimum distance of 12 mm and maximum distance of 50 mm from each other
- 2. Round off the corners of each cut piece
- 3. Peel off the protective liner by approx. 50 mm and position the non-slip cover on the desired surface, avoiding touching the adhesive with your fingers
- 4. Peel off the protective liner even further and gradually lay the non-slip cover
- 5. For small cut pieces, remove the protective liner completely, hold the cut piece at the corners and place it centrally on the intended surface, then press it down
- 6. Finally, roll on firmly using the pressure roller, always starting at the centre and rolling towards the edges
- 7. On stairs, lay the non-slip cover approx. 12-15 mm back from the edge of the step to prevent premature wear and turning up of the cover
Removing/replacing
- 1. Use a hot air blower and a joint knife to remove the old material
- 2. If necessary, clean the surface of any residues using degreasing agent or solvent before re-laying the non-slip covering
Material | PES - Polyester |
Length | 9 m |
Width | 50 mm |
Thickness | 700 µm |
Colour | Black |
Min./max. processing temperature | 7 to 25 °C |
Shelf life from production/conditions | 36 Month / at 10°C to 30°C |
Last viewed

Hexagonal nut with serrated washer

Raised countersunk tapping screw, shape C with Z recessed head DIN 7981, steel, zinc-plated, blue passivated (A2K), PZ drive, round head, shape C

Job+ T-shirt

Price sheet holder

Hexagon socket set screw with truncated cone ISO 4026 A2 stainless steel 21H, plain

Hexagon nut, low profile, with clamping piece (non-metal insert) DIN 985, steel I8I, zinc-plated, yellow chromated (A2C/A3C)

Hexagon socket set screw with ring cutter ISO 4029, steel, 45H, plain

Countersunk slotted head screw, Z DIN 965, steel 4.8, zinc-plated, blue passivated (A2K)

Double-ended socket wrench
Countersunk head screw with recessed head, H DIN 965, steel 4.8, zinc-plated, blue passivated (A2K)